You can make your own miniature layer cake with a spring theme! You will need at least two different colors of polymer clay, but preferably five (one for each cake layer, and a standard color for frosting), a polymer clay razor, and a clay pick or toothpick. Let's get started!
1. I am using spring pastel colors for each cake layer. You can choose to do the same, or find different colors. If you are making a spring pastel cake, start by blending green clay with a sizable clump of white clay:

Blend it by pinching it with your fingers and rolling it in your palm.
2. Once you have light green, roll it out until it is about half a centimeter thick. Cut out a small circle from cardstock paper or cardboard. This will be your mold for each layer.

3. Lay the circle on the clay and cut it out with a clay pick or toothpick.
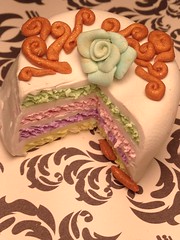
4. Repeat for the colors you want. I used light green, yellow, light pink, and lavender clay.
5. Roll a sheet of white clay about twice as thin as the cake layers. This will be your frosting. Cut out one less circle than the number of cake layers you have. For example, if you have four cake colors, cut out three frosting circles.

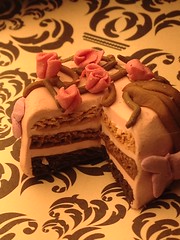
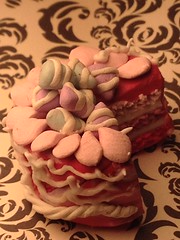
6. Stack your layers, alternating between cake and frosting. Make sure to place a cake layer on the bottom and on the top!

7. You might notice that your cake is a bit lopsided. Roll it on its side to even it out. You can also smooth it with your nail.
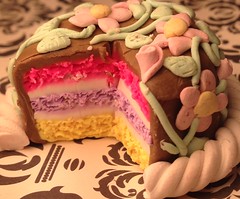
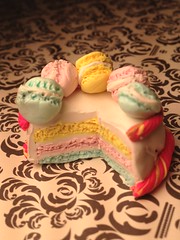
8. Roll a large sheet of thin white clay. Cover the cake with it as shown:


Bottom view

Cut the excess with scissors

9. Mark the cake where you are going to cut it. This will help prevent unevenness in the slicing.
10. Slice it! Use a polymer clay razor or X-acto knife. Kitchen knives (except extremely sharp ones) or scissors will not work! They will smudge your layers!

11. Texture it by lightly poking a clay pick or toothpick into each cake layer multiple times:

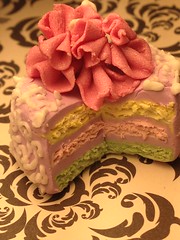
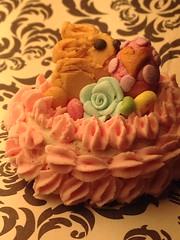
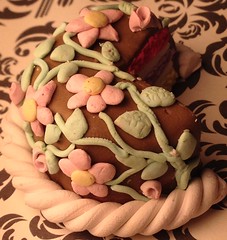
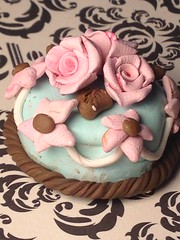
12. Finish it!

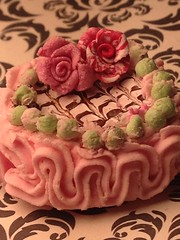
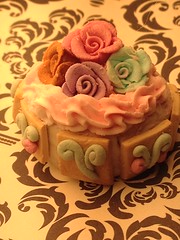
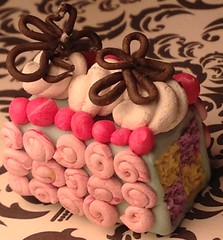
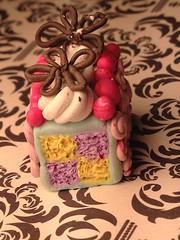
13. Now it's time to decorate! You can improvise your own decoration, or follow my tutorial:
14. Roll out a long, thin log of clay.

15. Cut a small section of it and roll it into a spiral.

16. Repeat this process to cover the cake, leaving a hole in the center.

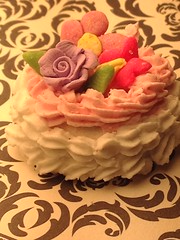
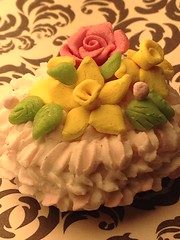
17. Make a rose!


Roll it up!

Add a sheet of clay for a petal.


\

Your rose is done!
18. Place it on the cake!

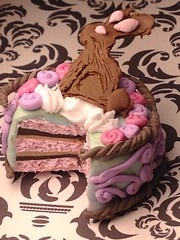
You have now made a spring layer cake!