Can't Find What You're Looking For? Try Searching!

Saturday, June 18, 2016

Miniature Collection: Neapolitan!

I will select one of these miniatures to feature in a tutorial. Please comment your favorite one and I will make a tutorial for it!

Neapolitan Vacherin
Millefeuille
Swiss roll baked Alaska
Neapolitan Scoop Bar Cake
Mini Dome Cake
Macaron Wreath Cake

Tuesday, April 19, 2016

House Finches: Nesting and Chicks!


One of the most common sounds of the spring are the high, melodic warbles of the house finch. House finches are becoming increasingly common, and are in fact an invasive species that are beginning to replace the purple finch.

 House finches were first introduced as pets for the males' bright crimson heads and sweet songs. Pet stores imported these birds from their native habitat of California. However, once this illegal behavior was discovered, shop owners did not hesitate to release these birds into the wild. In the wild, they out-competed purple finches for food and habitat until they became a common sight in nearly every state. How can you tell which bird is which?
The purple finch's bill is conical shaped, whereas the house finch's bill is curved slightly downwards. However, this is very hard to observe from a distance, or even from reasonably close.  The male purple finches have less streaking than the male house finches. While it may take some practice to discern between the two, identifying them should become easier after you see both kinds.

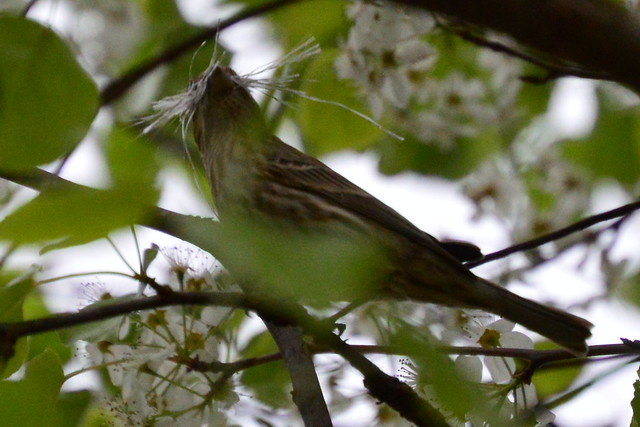
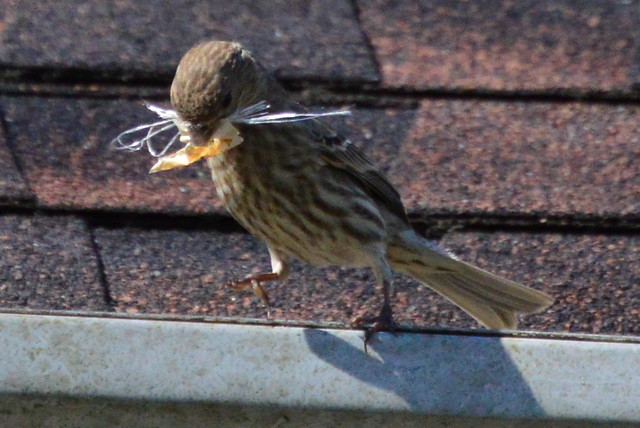
House finches are especially common because they thrive near humans, and often nest in door wreaths! During the mating season, males present females with gifts of regurgitated food and nesting materials. The female, however, actually builds the nest. The pair remains together, with the male defending the female. Unlike most birds who defend the nesting territory, male house finches defend the females themselves. 
 
Female house finch with nesting material


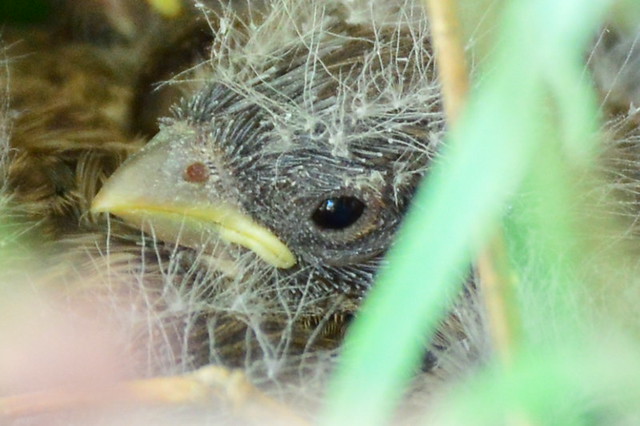
Once the nest is built, the female lays her eggs. She lays 2 to 6 light blue speckled eggs, and incubates for 12 to 14 days. Once the chicks hatch, the mother feeds them regurgitated seeds until they leave after 11 to 19 days. The males help with this task by feeding the females while on her nest. Even after the young leave the nest, the parents continue to feed them until they find their own mates,
 
I saw these house finch chicks in my neighbor's door wreath!
 
Only two days later and wing feathers are almost developed!


Wednesday, April 6, 2016

Miniature Tutorial: Sushi!

 
With this tutorial, you can learn how to make an avocado 'caterpillar' sushi roll!

1. Roll out a rectangle of black polymer clay: 
 
2. Trim it into shape with a polymer clay razor or Xacto knife.
 
3. Roll out a thick log of transparent clay. Transparent clay looks like and off-white color. I also found that mine glows in the dark!
White clay is on top, transparent is on the bottom


4. Flatten the white clay and wrap it around the transparent log. This is the beginning of your rice.
 
5. It should look like this:
 
6. Roll it out until it is extremely thin. You should have a substantial length. Make sure your clays are warm because if they are too rigid your string of clay will break when you roll it thinly!
 
7. Position it on the black rectangle, cutting it to length and repeating until it covers the rectangle:
 
You should see a transparent circle surrounded by a white coating.

8. Make your fillings! You can experiment here, but I made a shrimp tempura and vegetable filling. First, roll out 3 thin strings of orange clay and 2 thin strings of white. I did not have orange so I mixed yellow and a speck of red.
 
9. Stack them! 
 
10. Roll them!
 
11. Make two similar strands of green. Stack all of them next to each other and place them on the sushi, black rectangle (seaweed) side up:
 
12. Roll up the sushi! Pick up one end of the rectangle and bring it over the filling.
 
13. You will have some gaps in your seaweed. Fill them in with more 
'rice.'
14. Now, cut your sushi! 
 
 
15. Make the avocado using the images below:
 
Add some more streaks of yellow, dark green, and light green than shown here.

Crumple it into a ball

Flatten it and add some more streaks. Make sure your clay is warm (by kneading it in your hands), otherwise it will break!
 Cut it into small strips, and place them on top of your sushi:
Close up of the filling

Photo Gallery: Miniature Sushi!


I made these sushi rolls as a polymer clay cane, and attached them to cut strips of balsa wood (found at a craft store). A tutorial is on its way!